Challenge: I recently cloned one of the project from github for research. However some of the projects were not loading, and also did not give good error to check on. Then I tried loading that particular project in a separate visual studio, and then got below error.
The imported project “C:\Program Files (x86)\Microsoft Visual Studio\2019\Professional\MSBuild\Microsoft\VisualStudio\v14.0\WebApplications\Microsoft.WebApplication.targets” was not found.
However the suggestion did not work in my case and if the suggestion did not work in your case as well then copy all the files from folder “C:\Program Files (x86)\Microsoft Visual Studio\2019\Professional\MSBuild\Microsoft\VisualStudio\v16.0” and paste into folder “C:\Program Files (x86)\MSBuild\Microsoft\VisualStudio\v14.0”.
This post explains how to include environment specific config files in regular ASP.NET Framework Visual studio project and build the same. This is also called as config transformation. Let’s start.
Open the Web application project in Visual studio or a create a new one. I have used VS2019. But this works VS2010 onward.
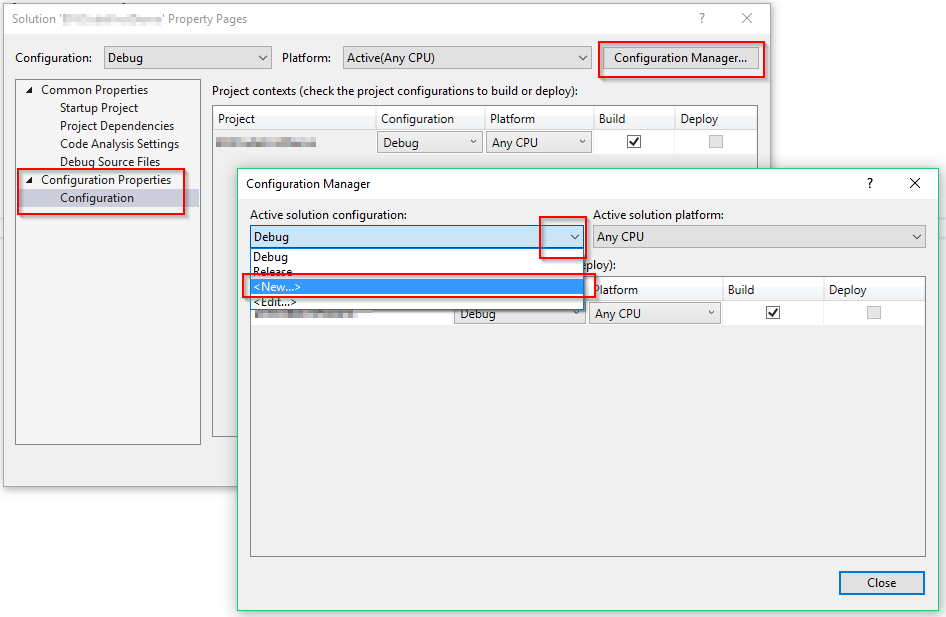
Right click the solution. Select ‘Properties’ from context menu. Expand ‘Configuration Properties’. Click ‘Configuration’. Click button ‘Configuration Manager’.
In new dialog – Configuration Manager, Select ‘New’ from the drop-down ‘Active solution configuration’.
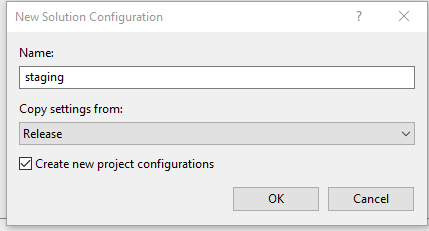
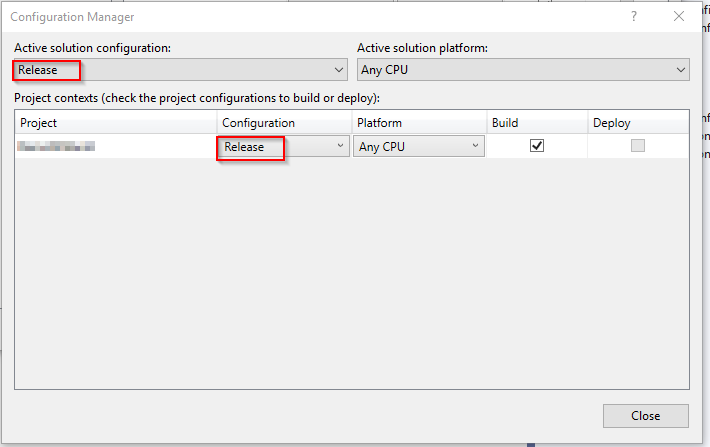
Provide the new environment name here. Let’s consider ‘staging’ for demo purpose. You may copy settings from existing configuration. I copied from ‘Release’ or you may create a new one. Check the checkbox for ‘Create new project configurations’. This will add the configuration at project level with the same name. In this case it is ‘staging’. You may add a new solution platform from second drop-down ‘Active solution platform’. You already have ‘Any CPU’ and ‘x64’. I selected ‘Any CPU’. Basically it is all about combinations of ‘Active solution configuration’ values and ‘Active solution platform’ values. So, make sure for every possible combinations, configuration names are same both at solution level and project level.
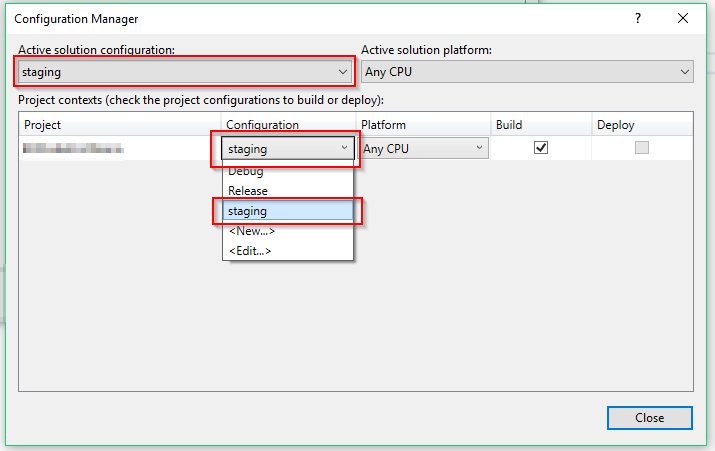
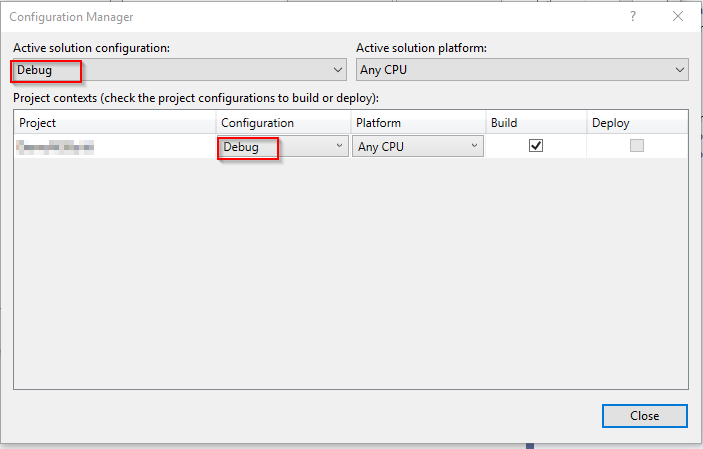
Here we make sure, for combinations at solution level i.e. staging | Any CPU and staging | x64, we have ‘staging’ configuration selected at project level too as below. These mappings are very important. Note that the given configuration from command line or selected configuration from visual studio is nothing but the solution configuration. And whatever project configuration is mapped with the solution level configuration will be applied for the project config files transformation. So, project configuration name decides what configuration transform file to pick, since $(Configuration) represents the mapped project configuration and not the solution configuration. This can be complicated so to keep things simple just make sure the corresponding project configuration name matches the respective solution configuration name.
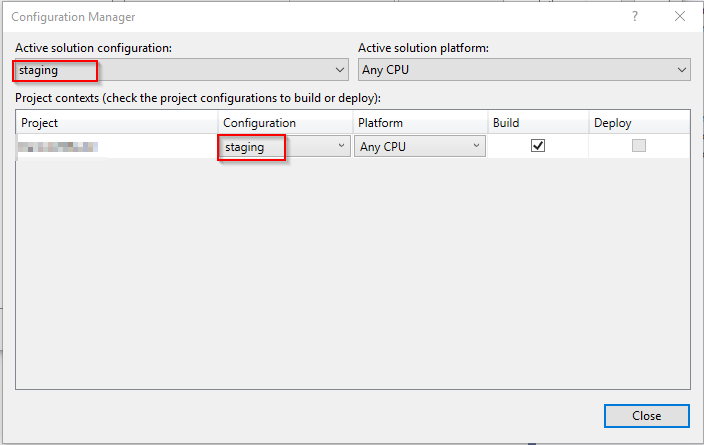
So, it should look like below for every possible combinations.
When you add a new configuration and close. Then the active solution configuration will change. Here from debug to staging will be set. So, if you don’t want this to happen then select the debug from drop-down of ‘Active solution configuration’ before you close this dialog else you can come back and change it.
Once you are done with the configuration manager, then go to Solution Explorer. Right click the web.config. Select ‘Add Config Transform’. Once you do this, Web.staging.config file would be added. Here you can add your settings or change the existing with respect to the base file – web.config. However if you add any other config file like app.config and right click them, you will not find this option. Please let me know in comments if you see it :). So, in this case we need to do it manually i.e. add required environment specific config files and add the details to csproj file.
So first, from Visual Studio, add the app.config file in root folder. Save all. Close the Visual Studio. Go to project folder where you see .csproj file. Create file named app.staging.config. Do this for all configuration if required. Good to have it created, otherwise it might throw error during build.
Now, open the csproj file in a notepad. Find below line.
<Content Include="app.config" />
Below this, add the entries for the newly added files as dependent files as shown below.
Now most important part comes, which does the transformation of the config files. Apart from config file references in csproj file. For each of the base file, you need to add the TransformXml task. Use target named ‘AfterBuild’ as below.
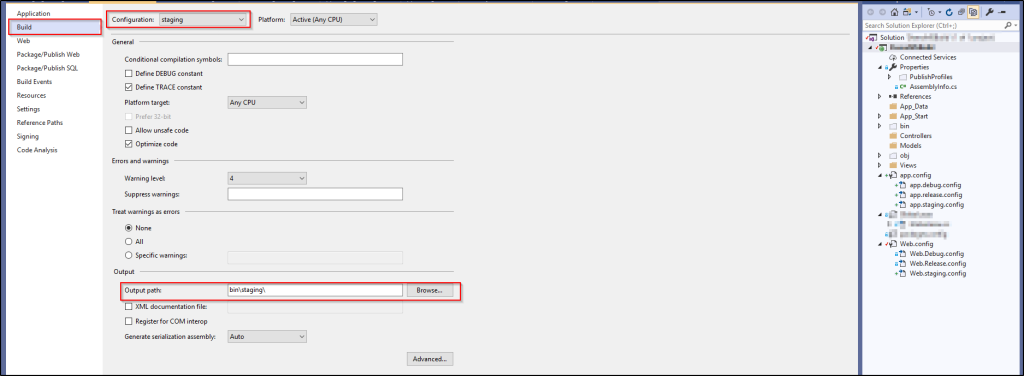
Now, open the project in Visual Studio. You can see dependent files below app.config. You may override the settings in these dependent files. Good to provide the configuration specific output folder path. Double click the properties. Go to build tab in left pane. Select the configuration from the drop-down and provide the Output path with backward slash in end.
Save all.
To build the solution, you may select the configuration from toolbar and right click the solution and select “Build solution” or Ctrl+Shift+B.
You could use the cmd to build the solution using MSBuild command.
C:\Program Files (x86)\Microsoft Visual Studio\2019\Community\MSBuild\Current\Bin>msbuild <sln file path>\<project>.sln /p:Configuration=staging /p:OutputPath=<path of folder where you want the build output>
That’s all. Hope you found this to be helpful. Please drop your comments below if any thoughts or suggestion.
Challenge: Visual studio sometimes looks for .net framework source code while debugging. It would prompt to allow download of the source code file.
If you are also facing such an issue or you do not want this behavior, then here is the solution.
Solution: Open visual studio, go to Tools > Options > Debugging > Enable Just My Code — Check this one.
It should work. Just in case, also delete the files from obj folder and bin folder of the project. Delete files from Temporary ASP.NET Files of your .NET framework version. (C:\Windows\Microsoft.NET\Framework\v4.0.30319\Temporary ASP.NET Files) Restart the IIS and visual studio.